viernes, 3 de octubre de 2014

Soap Popsicle


you'll need....a popsicle mold...this one's from go planet earth...but you can certainly use whatever mold you want...small soap bags...also from go planet earth...popsicle sticks...and large binder clips....


also...grab some clear melt and pour soap...glass measuring cup...soap colorant...i prefer liquid over the powder or gel...fragrance oils...and rubbing alcohol in a spritzer bottle...


take your soap and cut up into chunks...and put in glass measuring cup...it takes about 2 1/4 ounces for one soapsicle...now that's solid weight...not liquid...


head on over to the microwave...you'll want to do 1 minute at 50% power...then...until it's completely melted...do 30 second bursts at 50% power...you want it to melt...but not to boil!...


once it's all melted...you'll want to spritz with rubbing alcohol...this takes the bubbles out of the soap...


add a couple of drops of colorant...a little goes a long way!...i tend to do a drop or two...stir...and decide if i like what i'm seeing...if not...add a drop more...


then add your fragrance oil...the amount is up to you and your sniffer!...make sure to stir!...


spritz again with the rubbing alcohol...keep on going until you don't see hardly any white bubbles...


pour slowly into your mold...

see all those nasty bubbles?...gotta get rid of 'em...


once again...spritz with your alcohol until it's pretty much bubbleless...is that even a word?...lol...


after you've filled all the popsicle slots that you want to...put the cover on...note...if you're wanting to do multiple flavors scents...you gotta act kinda quick...you can't have the soap setting up before you get the popsicle sticks in there!...


now...take the binder clips...and put on the popsicle sticks...i do this so that the sticks don't get lost when you put them in the mold...


insert all the sticks into the slots of where you've poured the soap...see how the binder clips just rest on top?...now...just leave it be!...it's going to take about an hour to set up!...


remove the binder clips from the sticks...then lift the top off...just slighty jiggle the stick...if it still moves....it's not set completely!...give it a little bit more time...


now...this might be the most difficult part of this project...getting 'em out of the mold!...it's tough!...anywho...you'll want to pry the sides of the mold from the soap at the top...this will start little air pockets...

 
you'll keep squeezing all around the mold...if you notice...there's little areas that you can see a color difference...this is because the soap has pulled away from the mold...you want to keep going until there's that difference in color everywhere...


starting pushing from the bottom...put a little muscle into it!...lol...eventually the soap will pop up a bit...


grab the stick and slide on out...


you'll want to air them out a bit...just in case there's condensation on the soap...i do this by just grabbing a piece of styrofoam and putting the stick in there...you'll want to let 'em hang out for a while...this makes it so much easier to put in the baggies!....


if you want your soap to look like it has a bite mark...you'll need to get a tiny little scalloped circle cutter...or...you could just take a nibble!...lol...

 
right on the corner...use the cutter...see...looks like little bucker marks!...

 
take your baggies and plop 'em in!...

 
twistie tie 'em up!...add a ribbon, label, or anything else you want!...

 
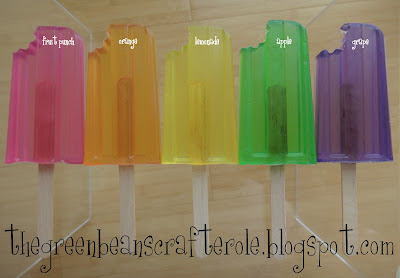
now...the one i just did was fruit punch flavored scented...but take another looksie at all the ones you can do up!...aren't they purty...sorry...that's my wv showing...lol...now of course...it's totally up to you whether or not you want to tell the kiddies it's soap....you can just let 'em find out for themselves!...lol...enjoy!...

http://thegreenbeanscrafterole.blogspot.com/2010/07/wash-your-mouth-out.html
Halloween Soap Hand


you're going to need....one unpowdered vinyl or latex glove....fragrance oil of your choice... heaping measuring cup of cubed clear melt and pour soap...glow in the dark powder....rubbing alcohol in a spray bottle...


you'll also need....clothespins...and a pair of some type of containers to rig up a contraption for your mold...i used these two glass vases that are 9 1/2" inches each...but along the way...i realized they weren't tall enough once i poured the soap...because it should be about 10 1/2" inches....


attach the glove to the cylinders with the clothespins....i did two on each side...


here's an aerial shot...


go to the microwave and melt the soap...i did three minutes at 50% power...if it's not all melted...do another minute at 50%....you're going to need to end up with about two cups of melted soap...so if you don't have enough...add a couple more chunks in....


add about a teaspoon of the glow in the dark powder...a little goes a long way!...


mix really really really well!....you want it all through out your soap!....it likes to hide out on the bottom...so make sure you're scraping the bottom with your spoon!...
 
then add your fragrance oil...mix 'er up!...
 
see all those nasty bubbles around the edges?...we gotta get rid of 'em!...and that's what the rubbing alcohol's for!...spray liberally until they disappear!...
 
all gone!...
 
slowly pour your soap into the glove...don't go too quick...or your containers might fall over...just keep going until there's no soap left...
 
once again...get rid of the bubbles with the rubbing alcohol...
 
now leave it alone!...it's going to take about an hour to harden...

***this pic shows ya how i solved the problem of adding height to my containers...just grabbed these little guys from the cabinet and slapped 'em under...they added another 2" inches!...
 
when all ready...take your glove down...
 
cut the glove away...it'll come right off...i just like to cut it...don't want to break any fingers off!...
 
all done!....
 
no glow in the dark powder?...don't worry!...just add some soap color instead!....like this orange one i did up!....
 

http://thegreenbeanscrafterole.blogspot.com/2010/10/gives-new-meaning-to-hand-soap.html

viernes, 15 de noviembre de 2013

Faux Taxidermy Deer Diy!


Faux Taxidermy Deer Diy!

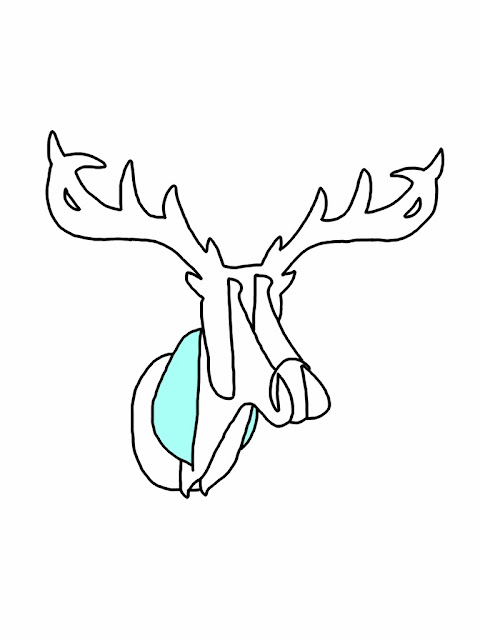
Make your own deer head! I've been wanting to make a fake deer head like this for an unreasonable amount of time. Well I got around to it today! First of all you'll need to print these out.  They are templates, cut them out and they will piece into each other to make the deer/moose head you see above! It will only take two pieces of paper, and will make a cute-sized head. Oh and most importantly... PRINT ON CARDSTOCK.   

Here are the printables once more...


Note: The so called "Noggin" is actually apart of the neck. Now you can make it in just three easy steps.


Thats all! Print, Cut, Create. Once you print it out its pretty self explanatory how it goes together. But if it isn't here are all the different parts labeled and put in place.

Antlers

Snout

Main Part 1

Neck

Neck 2. Please note that I made a mistake in calling it a noggin on the printable, oops!

Main Part 2.


Ok well I think these would look cool pretty much anywhere, plus they are so light that you can just tape or tack them up on the wall. I folded the back strips that stick out to be plat and then taped it up that way. Here is the sideview.


I am super stoked about this and I might just go make some more ;). Will you make one? (or more?) Leave a comment below.

Thanks as always :),

P.S. I have to give the credit where credit is due to Christina Loff from Chronicle Books Blog whose template was modified to create the free printable I have today. Thanks Christina!